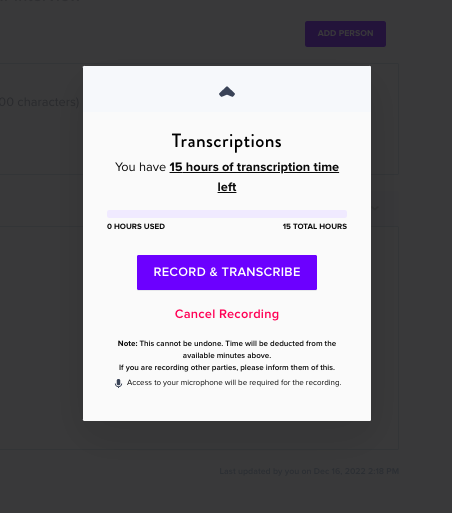
Record live conversations in GLIDR by accessing the native audio transcription feature, available on all tiers. Each tier includes a monthly transcription allowance: Garage includes 2 hours per month, Business includes 10 hours per month, and Enterprise includes 20 hours per month.
Getting Started
Open an Evidence card and locate the Record and Transcribe audio button (microphone icon) near the bottom. A confirmation pop-up will appear showing your available transcription time. Note that additional time can be purchased by contacting support@glidr.io.
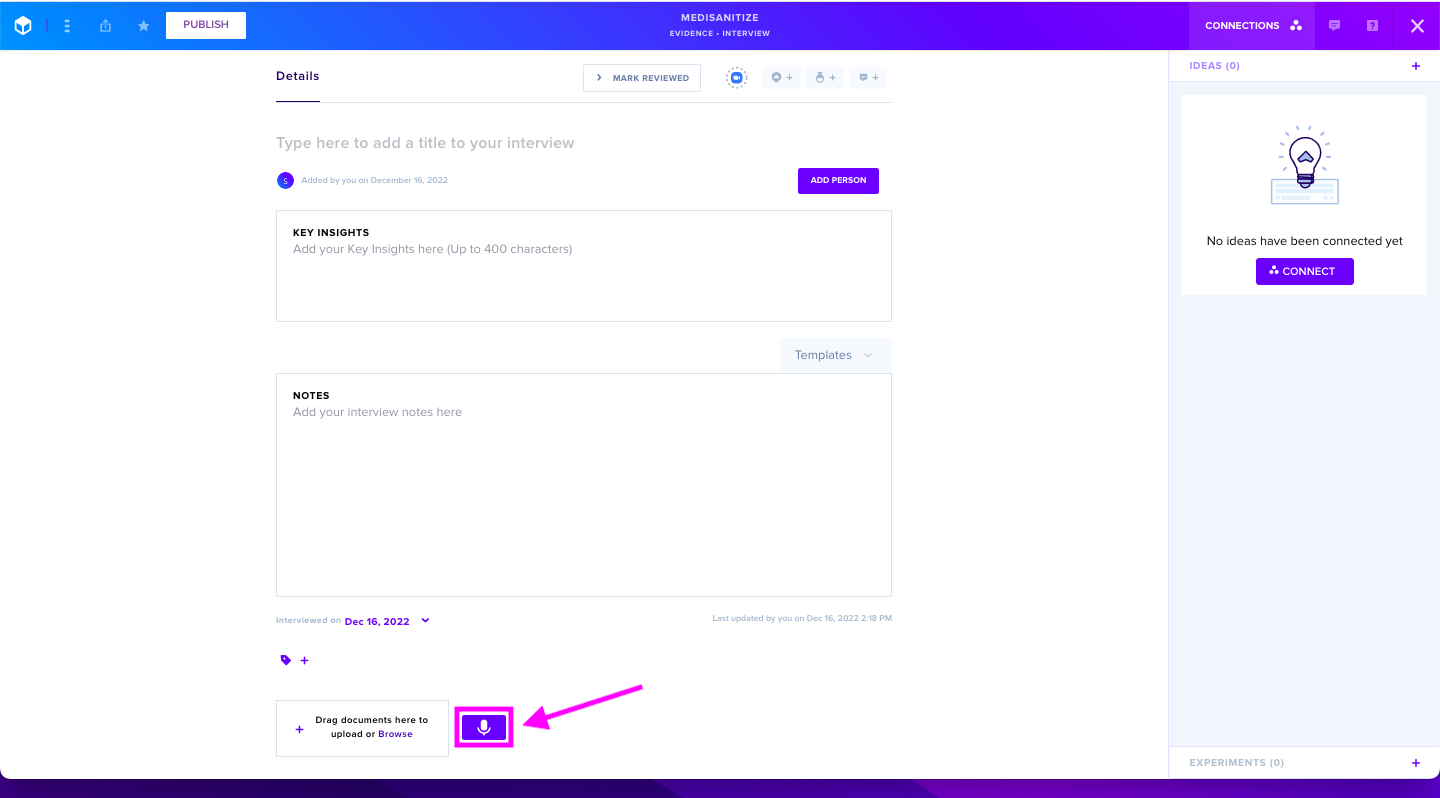
Recording Process
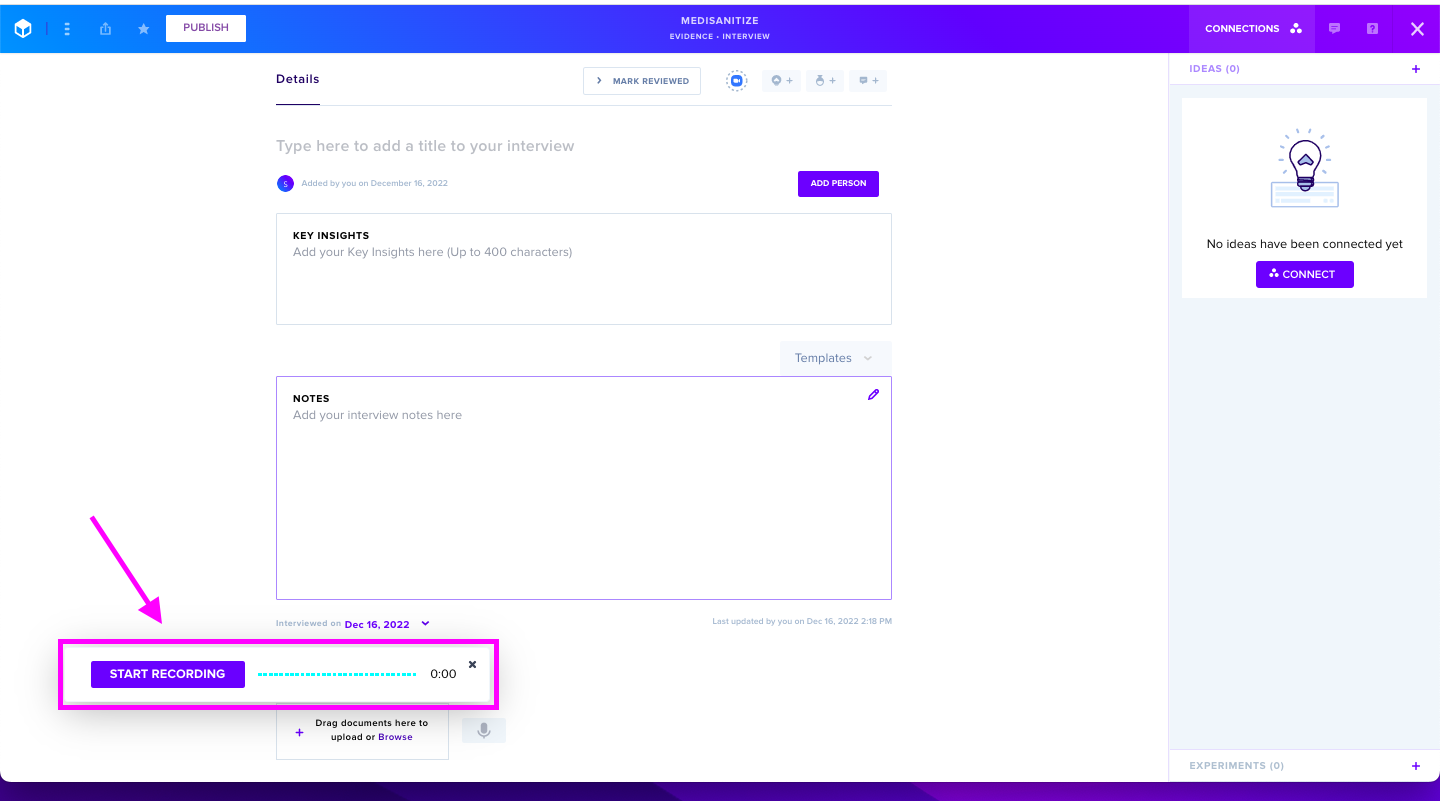
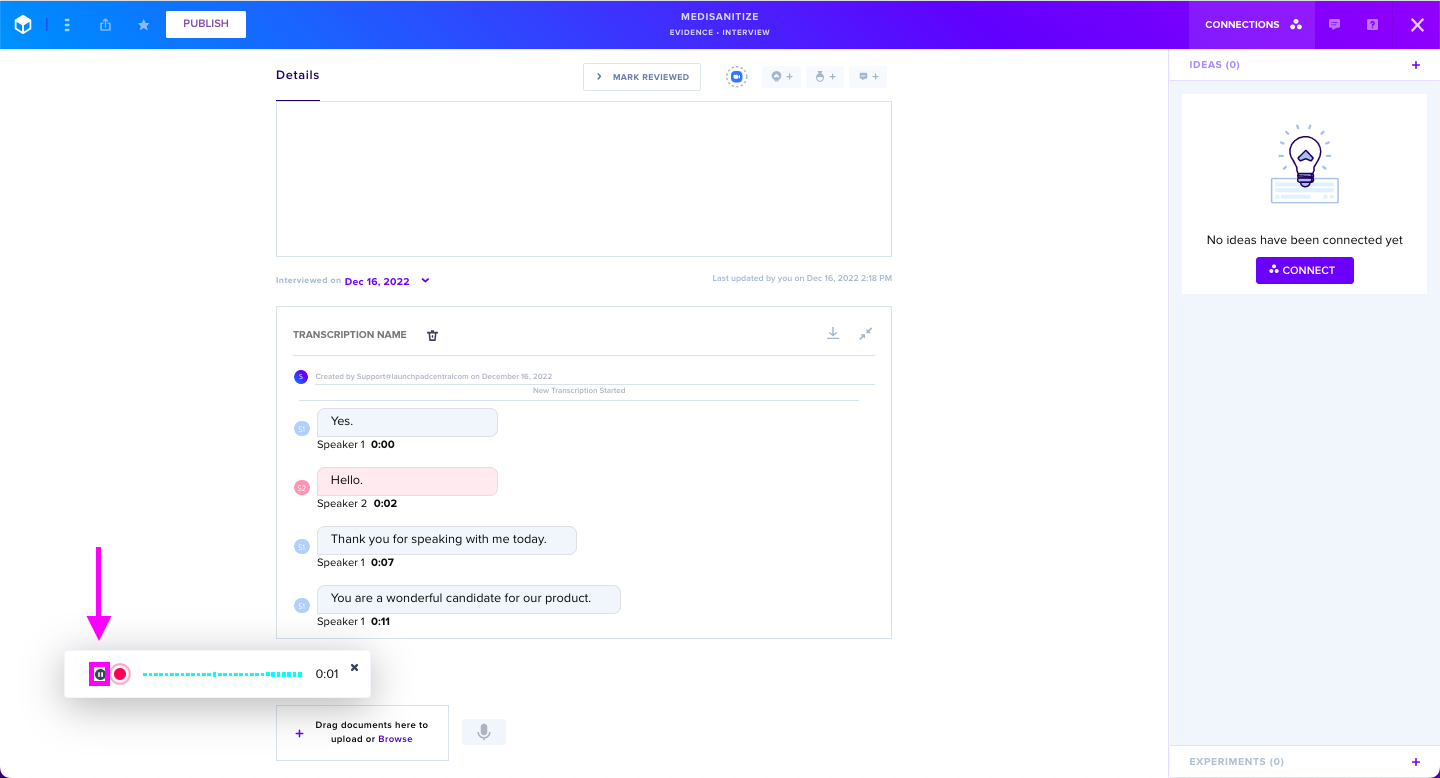
Click the Start Recording button to begin. As you speak, the transcription text appears below the Notes section. Use the X icon to end recording or the Pause button to temporarily stop without closing the session.
Speaker Assignment
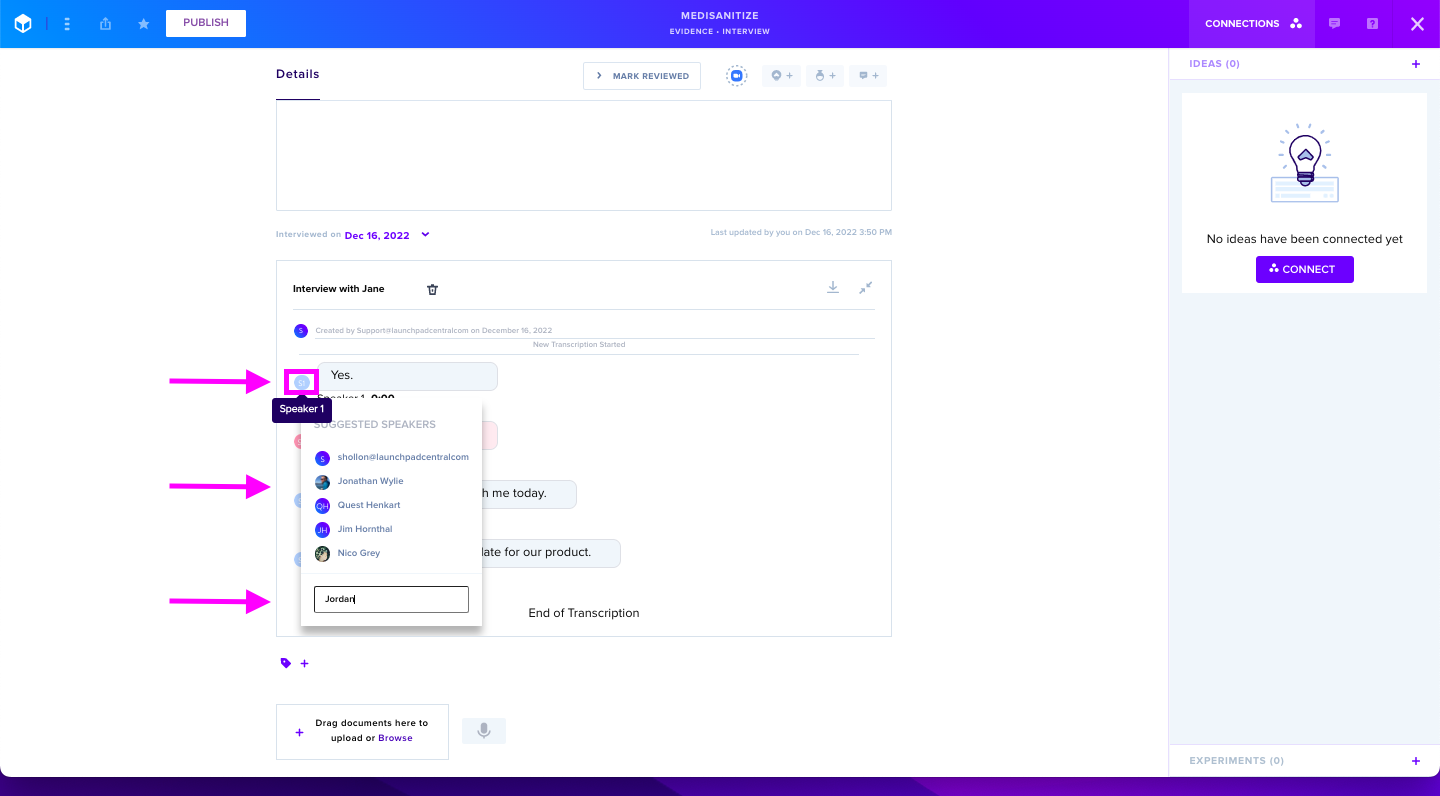
Assign up to 5 speakers per transcription by clicking the speaker icon and selecting from contacts or entering names manually.
File Upload
Alternatively, drag and drop audio or video files into the upload section at the bottom of an Evidence card. Select the transcription option from the pop-up menu. Allow several minutes for processing to complete.
Editing
Once finalized, edit transcriptions by clicking into any line and making adjustments.