
Overview
You can connect an AI assistant (Claude, ChatGPT, Gemini, etc.) to your GLIDR organization using Model Context Protocol (opens in new tab). Once connected, the assistant can answer questions about your work using your real data — projects, ideas, evidence, experiments, and interviews.
Try things like:
- "Summarize the state of my
<project name>project." - "Which interviews mention
<topic>?" - "What product ideas are currently in progress?"
- "Find every evidence card from
<company>."
Get your connection URL
GLIDR uses a single shared MCP endpoint for every customer:
https://webhooks.glidr.io/mcpWhen you authorize the connection, GLIDR will prompt you to pick which organization the assistant should access and sign you in.
Add it in your assistant
Claude (web or Desktop)
-
Open Customize → Connectors (opens in new tab). (If you land in Settings → Connectors instead, follow the Customize link at the top — Anthropic moved the panel.)
-
Click the + in the top right of the Connectors column, then Add custom connector.
-
Name:
GLIDR. Remote MCP server URL: your connection URL from above.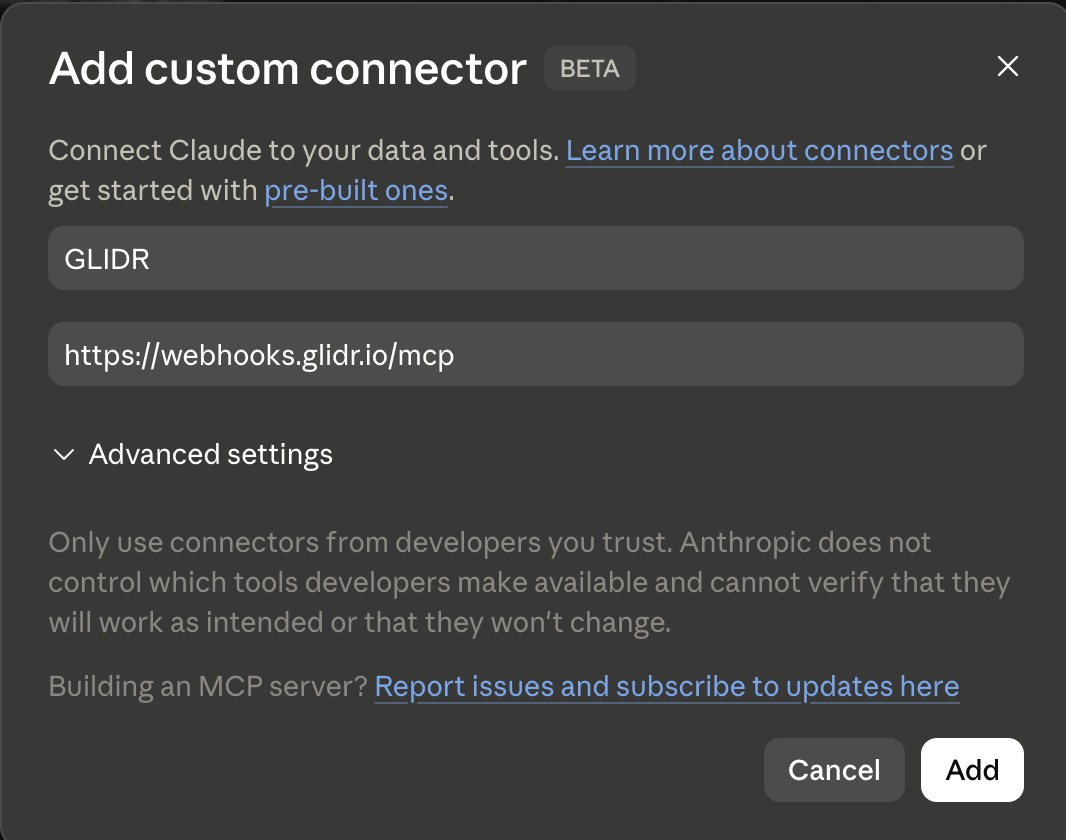
-
Click Add, then authorize when Claude prompts you.
ChatGPT (Pro, Business, Enterprise, or Edu)
OpenAI renamed Connectors to Apps (opens in new tab) in December 2025. Custom MCP apps require ChatGPT Pro, Business, or Enterprise/Edu — Free, Go, and Plus don't include them.
Custom apps can only be added on ChatGPT in your web browser at chatgpt.com (opens in new tab). The mobile and desktop apps don't expose the Apps setup flow. Once added on the web, your assistant will use the app across all your devices.
-
On chatgpt.com (opens in new tab), open Settings → Apps and click + Create. The first time you do this, ChatGPT will prompt you to enable Developer mode — accept it. On Business or Enterprise/Edu, your workspace admin may need to enable custom apps from Workspace settings → Apps → Drafts first.
-
Name it
GLIDR, paste your connection URL from above, leave Authentication as OAuth, and check I understand and want to continue.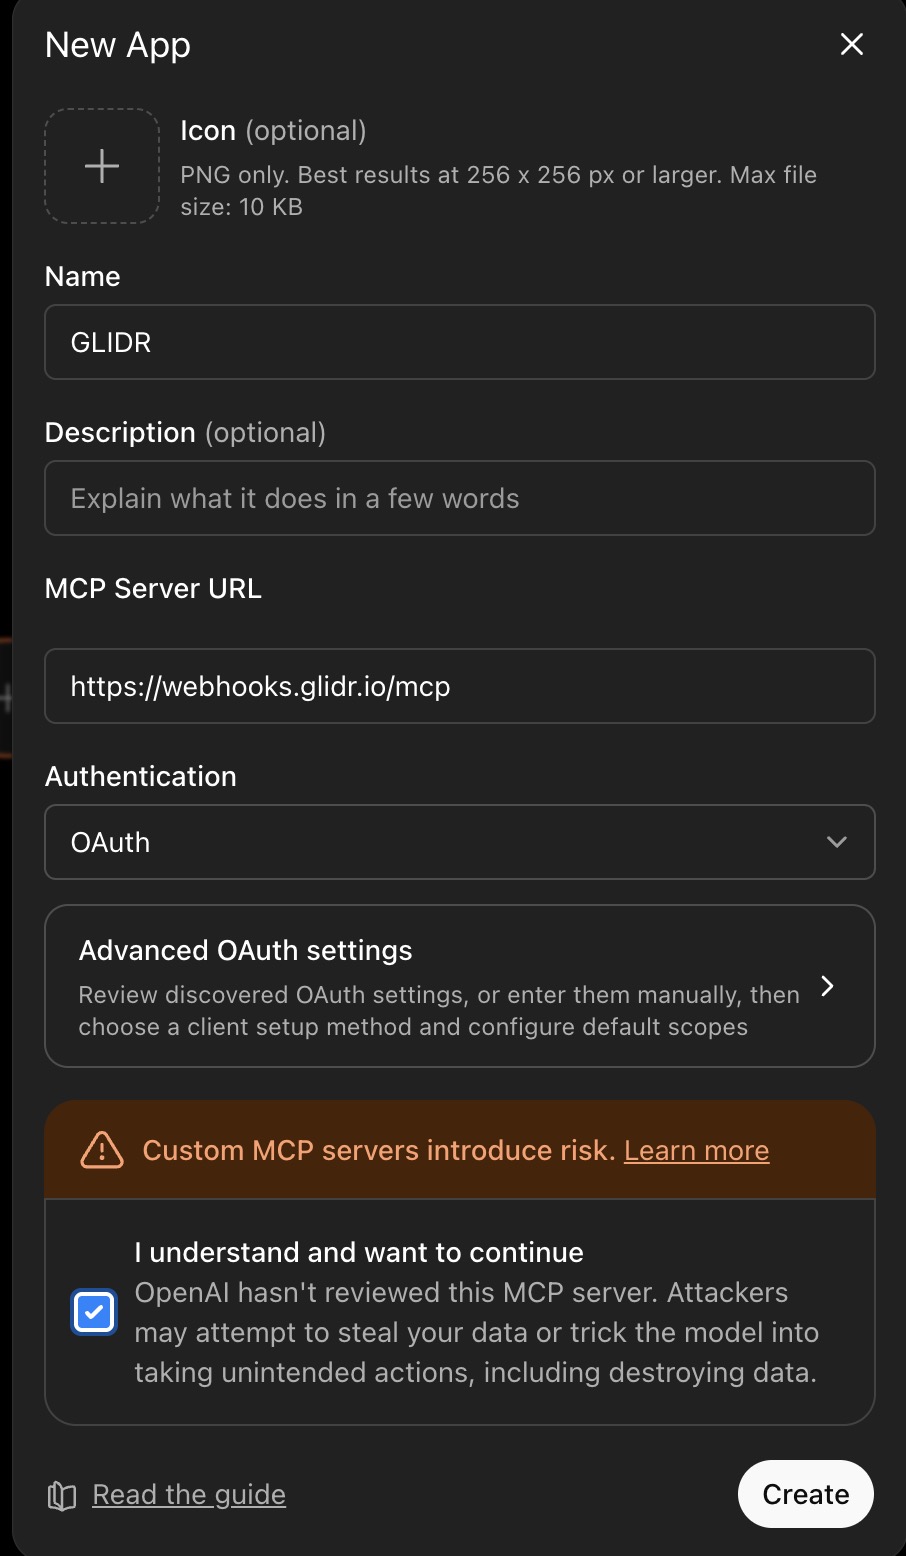
-
Click Create and authorize through the OAuth prompt.
Other clients
Most assistants have a Connectors or Integrations panel. Paste your URL, give it a name, follow the sign-in prompt.
Sign in
After you add the connector, GLIDR opens a sign-in window in your browser. Sign in with your normal GLIDR account. You're done.
You'll be asked to sign in again every so often. That's normal.
What it can do
The assistant has read-only access to anything you can already see in GLIDR:
- Project dashboards, market analysis, and ecosystems
- Business ideas (BMC) and product ideas
- Evidence, interviews, and experiments
- Cross-project search and interviewee lists
It can't create, edit, or delete anything — anything the assistant tells you to do, you'll do yourself in the GLIDR web app.
Permissions
The assistant only sees what you have access to. If you can't open a project in the GLIDR web app, the assistant can't either.
Troubleshooting
- "Couldn't connect." Double-check the URL — it must be exactly
https://webhooks.glidr.io/mcp(no trailing slash, no/api/prefix, no org subdomain). - Sign-in window doesn't open. Fully quit and reopen the assistant after adding the connector.
- The assistant doesn't find anything. Confirm you signed in as a user with access to that organization. Each connection is scoped to your account.
See also
- GLIDR AI Agent overview — the in-app AI assistant, built into the GLIDR web app.
- Integrations FAQ — common questions across every GLIDR integration.