Add projects for your teams to work in.
For organization owners and admins, each project created in GLIDR may correspond to a specific product, team, or company. You can track the unique title, description, and all data like ideas and evidence. The Project Dashboard gives you a high-level overview of how the project is operating, with metrics to help you understand your progress better.
Creating a Project
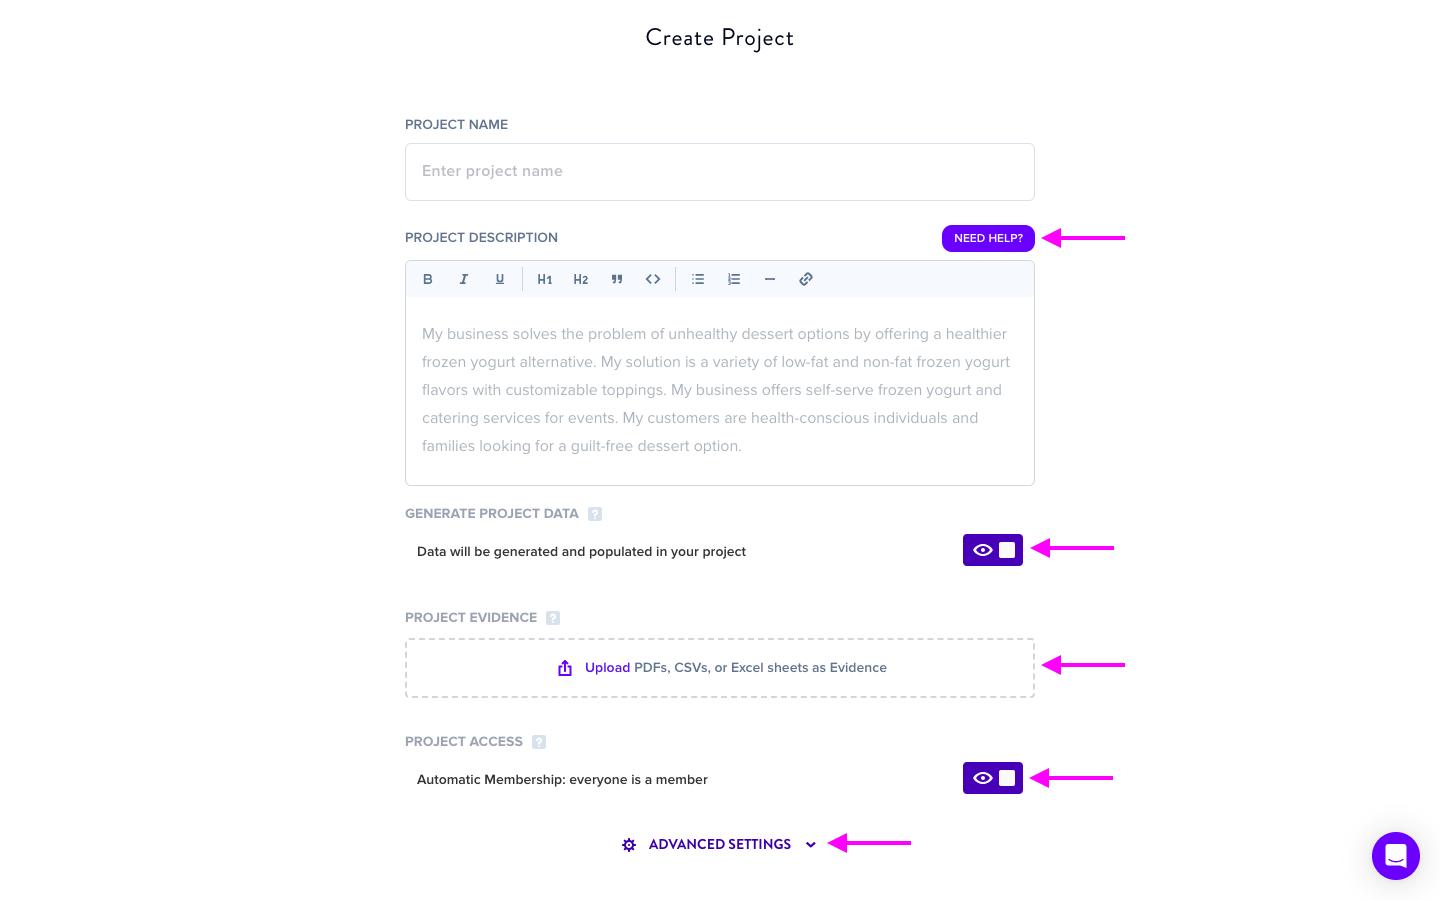
First, open Organization Settings and click on the white + button next to Active Projects in the left-side navigation. Then fill out the project name and description. If you need help with your project description, select Need Help? for a deeper dive with the Prompt Generation Assistant.
By default, AI is enabled for every project. However, should you choose to disengage the AI and build a project from the ground up, your project will start with an entirely blank canvas and dashboard. This action cannot be undone once the project is created. AI features will not be accessible and cannot be enabled.
Upload a PDF, CSV, or Excel sheet as evidence. It will be summarized, added to your project Evidence Library, and used to inform your project generation.
For GLIDR AI Business and Enterprise, you will need to decide if you'd like to have your project's visibility set to Automatic Access or Invite Only (organization-level admins and owners have full access regardless). GLIDR AI Garage projects are all Automatic Access.
- Invite Only: Only members of this project can see the entirety of the project such as the canvas, evidence, experiments, and activity feed. Non-members can view the Project Dashboard Summary, Details, and Teams tabs as well as Riskiest Ideas and Project Labels. These users must already have accepted their invites to join the organization.
- Automatic Access: Your project is visible to everyone in the organization.
Advanced Settings
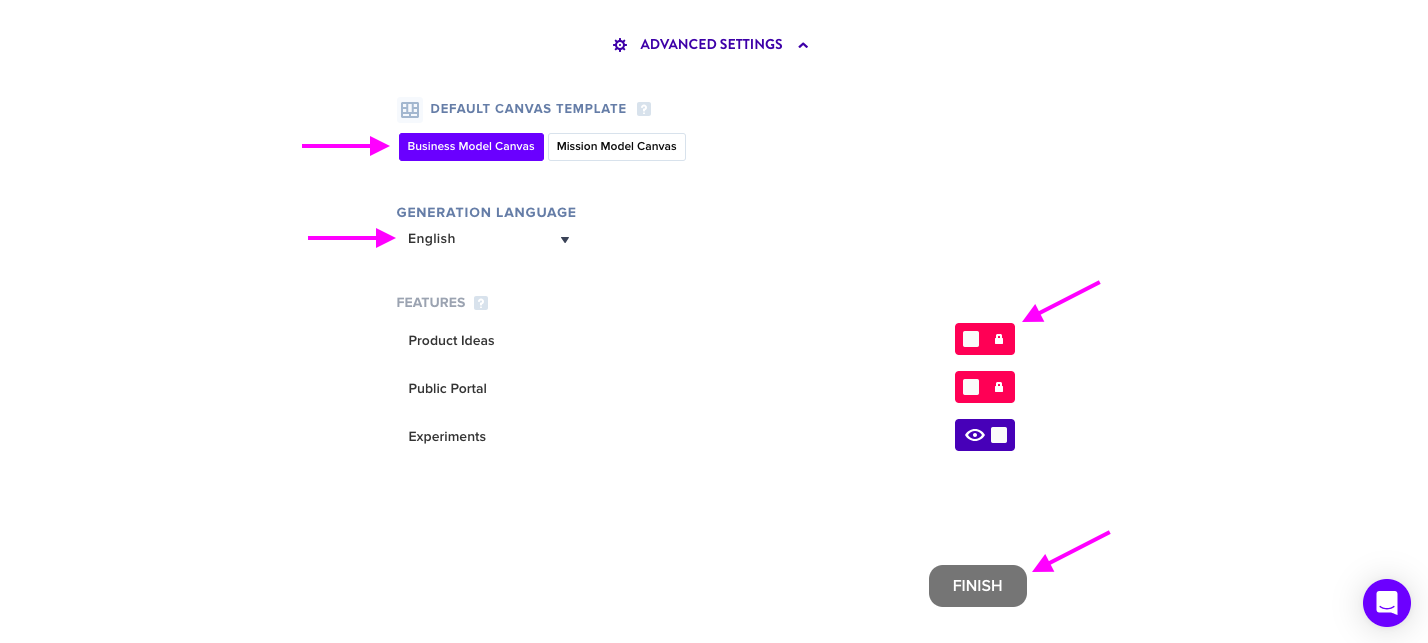
Choose between Business Model and Mission Model for your canvas template.
Select from a list of languages to generate your project. The default language is set to English. Alternatively available are Spanish, French, Italian, and Portuguese.
Additional features selections:
- Product Canvas — Ideal for Product Management and Roadmaps.
- Experiments — Test live user behavior with a clearly-articulated hypothesis that can be proven or disproven.
When all options are chosen, click Finish. You will be redirected to your Project Dashboard with a live update showing the progression of your project's generation status.
Learn more about managing Project Access for Business and Enterprise, and adding users to projects.